
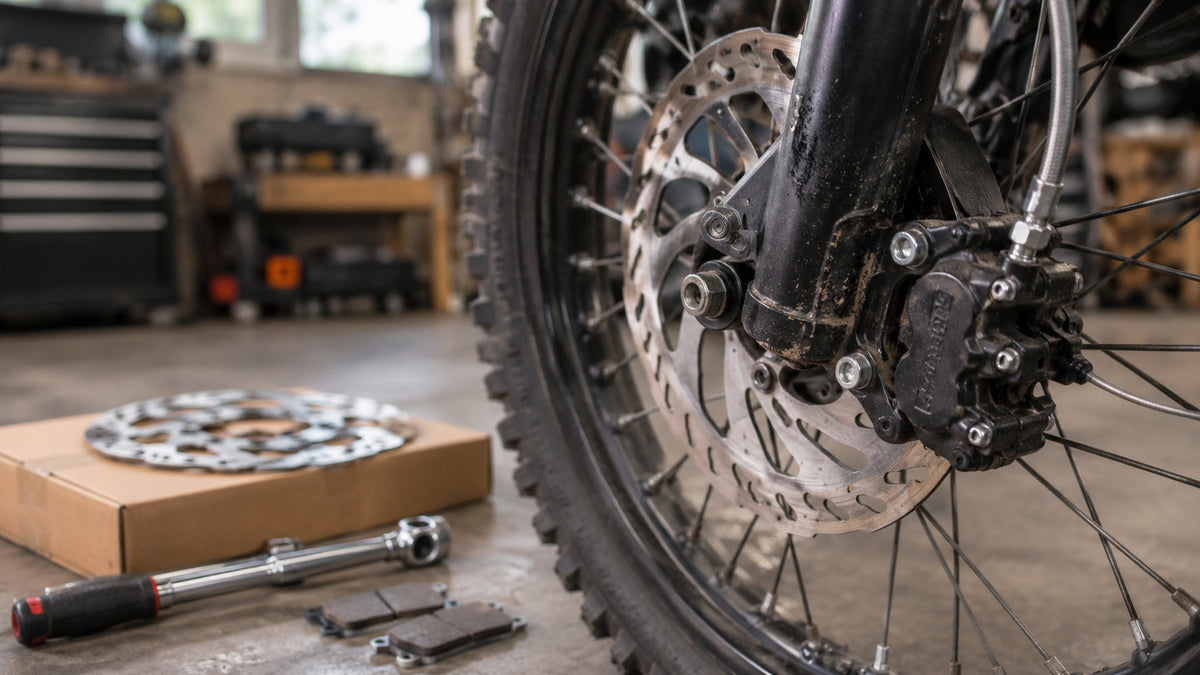
Surron Brakes Upgrade Guide: Pads, Rotors, and When to Upgrade
This Surron brakes upgrade guide walks you through the three questions every rider eventually asks: when should I upgrade, which pads should I choose, and which rotors are worth the money. By the end, you will know how to read the warning signs, pick pads and rotors that match your riding, and avoid the fitment mistakes that cost riders time and cash.
A quick note on sources. The details below come from manufacturer guidance, published parts listings, and public rider information. Sizes and fitment vary by model and year, so always confirm compatibility on the product page, and contact us if you are unsure.
Quick Takeaways
- Stock Surron Light Bee brakes use a 203mm rotor, and parts listings describe four-piston calipers at the front and rear.
- Upgrade when you notice fade, a long or spongy lever, noise, or when your riding gets harder than the stock setup can handle.
- Pads are the cheapest upgrade, and rotors are the best value upgrade for most trail riders.
- A 220mm rotor usually needs a caliper spacer or adapter to line up with the pads.
- Check fitment carefully, because the Ultra Bee uses different brake parts than the Light Bee.
How Surron Brakes Work
Your Sur-Ron uses hydraulic disc brakes. When you squeeze the lever, a master cylinder pushes brake fluid through a line to the caliper. The caliper pistons then press the pads against a metal rotor attached to the wheel, and friction slows you down.
Four parts decide how the brake performs. The pads create the friction. The rotor absorbs and sheds heat. The caliper and master cylinder control how much force reaches the pads. The fluid carries that force from your hand to the wheel. If any one of those is worn, dirty, or undersized, the whole system suffers.
On the Light Bee platform, parts listings describe four-piston calipers and a 203mm stock rotor, with thickness listed at roughly 1.8 to 2.0mm depending on the source. That setup works well for casual riding, but it has limits.
When to Upgrade Your Surron Brakes
Knowing when to upgrade is half the battle. You do not need to wait for a scare. These signs tell you the brakes need attention or an upgrade.
Brake Fade
Fade happens when the brakes get hot and lose bite. You squeeze the lever the same way, but the bike slows less. It shows up on long descents, repeated hard stops, or when you ride faster than usual. Fade is the clearest sign that your system is running out of heat capacity.
A Long or Spongy Lever
If you have to pull the lever almost to the grip, the pads may be worn or the fluid may need attention. A soft, spongy feel often points to air in the line. Both are fixable, but they also tell you the brake is not where it should be.
Noise
Squealing, grinding, or scraping can mean worn pads, glazed pads, a contaminated rotor, or a misaligned caliper. Noise alone is not always serious, but it deserves a look.
Longer Stopping Distances
If the bike simply takes longer to stop than it used to, something has changed. Worn pads and old fluid are common causes.
You Changed Something Else
Heavier riders, bigger tires, extra weight from accessories, or a faster setup all increase the demands on your brakes. If you have made changes that add speed or weight, stronger brakes should be part of the plan.
Your Riding Has Changed
Riding steeper terrain, carrying more speed, or riding longer sessions all push brakes harder. When your riding outgrows the stock setup, an upgrade makes sense.
Check the Basics Before You Spend Money
Many brake complaints come from maintenance, not weak hardware. Before you buy new parts, run through this quick check.
- Pad thickness: If the friction material is close to the metal backing plate or the wear mark, replace the pads.
- Rotor condition: Look for deep grooves, warping, blue heat marks, or a rotor worn thin.
- Fluid and lines: Check for leaks, cracked lines, or fluid that looks dark and old.
- Air in the system: A soft lever usually means the brakes need to be bled.
- Caliper alignment: Spin the wheel. The caliper should sit centered over the rotor without rubbing.
- Contamination: Chain lube or oil on pads or rotors ruins braking and usually means new pads.
Fresh pads and a clean bleed can transform a tired brake for very little money, so do this first.
Surron Brake Pads: What to Know
Pads are the quickest, cheapest way to change how your brakes feel. Understanding the main types helps you choose well.
Organic Pads
Organic pads use a softer compound. They are usually quieter, bite smoothly, and feel gentle at the lever. The trade-off is that they wear faster and can fade sooner in hot, hard riding. They suit casual and mixed trail riders.
Sintered Pads
Sintered pads use metal particles pressed together. They handle heat better, last longer, and resist fade, which makes them popular with aggressive riders and anyone who rides long descents. They can be noisier, and they may wear rotors a bit faster.
Match the Pad to the Caliper
Pad shapes are not universal. Moto-style calipers and bicycle-style calipers use different pads, so confirm the pad matches your exact caliper. Listings often name pad shapes for specific calipers, so read them closely.
When to Replace Pads
Replace pads when the friction material is nearly gone, when they are glazed and shiny, when they are contaminated with oil, or when the brake has lost its bite even after cleaning. Pads are a wear item, so plan to replace them regularly if you ride a lot.
How to Bed In New Pads
New pads need a break-in period so they lay down an even layer of material on the rotor. Make a series of slow, controlled stops in an open area before you ride hard. One brake kit seller advises bedding in slowly for at least an hour before stunting or heating the brakes. Skipping this step can cause noise and reduce stopping power.
Which Pad Should You Choose?
- Casual riders: Organic pads are quiet and gentle, and they work well for everyday use.
- Trail riders: A quality organic or sintered pad gives you a good balance of bite and life.
- Aggressive or heavier riders: Sintered pads handle heat and long descents better.
Surron Brake Rotors: Size, Thickness, and Design
Rotors matter just as much as pads. A bigger rotor gives the pads more leverage and surface area, and a thicker rotor holds and sheds heat better. Together, they can make a big difference at the lever.
203mm: The Stock Size
The standard rotor on most Light Bee platform bikes is 203mm. It is fine for casual riding, but it can overheat on long, steep, or fast rides.
220mm: The Most Popular Upgrade
A 220mm rotor is the go-to upgrade for riders who want stronger braking without replacing the whole system. Listings for 220mm rotors describe thicknesses around 2.2 to 2.5mm, a little more than stock. The larger diameter and added thickness improve braking force and heat management. One seller even suggests doing this upgrade before spending on expensive caliper changes.
Keep in mind that a 220mm rotor usually needs a spacer or adapter, which we cover in the next section.
223mm and 240mm Rotors
Some riders choose a 223mm Galfer-style rotor, which also needs a suitable spacer or adapter. Larger 240mm rotors are usually paired with moto-style brake kits designed for that size. Do not mix and match. A 220mm rotor will not let pads bite properly in a bracket built for a 240mm rotor.
Fixed vs Floating Rotors
- Fixed rotors: Single-piece design, simple, and usually better value.
- Floating rotors: Two-piece design that lets the braking surface expand slightly with heat, which helps manage heat and reduce warping. They cost more.
For many riders, a good fixed rotor plus better pads delivers the biggest improvement per dollar.
When to Replace a Rotor
Replace a rotor if it is warped, deeply grooved, worn below its minimum thickness, or discolored from repeated overheating. A damaged rotor can cause pulsing, noise, and uneven pad wear.
Caliper Spacers and Adapters
Going from a 203mm rotor to a larger one moves the braking surface outward, so the caliper must move too. A caliper spacer or adapter bracket handles that.
- Spacers: Listings describe small aluminum spacers that adapt the stock post-mount position to a 220mm rotor, and they are listed for use on both the front and rear.
- Adapter brackets: These relocate a factory or aftermarket caliper to the right position for 220mm rotors. Some listings note that clearance can depend on the fork you run.
- Thread locker: Many sellers recommend a light thread locker on the mounting bolts.
- Alignment check: After installing, spin the wheel and confirm the caliper is centered and nothing rubs.
Brake Kits and Caliper Upgrades
If pads and rotors still are not enough, a full brake kit is the next step. Moto-style kits usually replace the caliper, master cylinder, line, and rotor with parts built for stronger braking.
- Larger pads: Sellers describe moto pads as far larger than bicycle-style pads, which gives more contact area.
- Larger pistons: Bigger pistons improve power and heat management.
- 240mm rotors: Kits often pair with a larger, thicker rotor.
- Foot brake option: Some rear kits are compatible with a foot brake add-on, and dual-caliper brackets let you run two independent rear brakes.
These kits cost more and take more work to install and bleed, so they suit riders who ride hard and want maximum control.
Fitment: Make Sure the Parts Match Your Bike
Brake parts are not universal, and the wrong part can be dangerous. Here is how fitment generally breaks down, based on published listings.
- Sur-Ron Light Bee, Light Bee X, Segway X160 and X260: Many rotors, spacers, pads, and kits list fitment for these bikes.
- Surron Ultra Bee: The Ultra Bee uses different brake parts, and several 220mm rotor listings say they do not fit it.
- 79Bike Falcon M: Some 220mm rotor and bracket listings include it.
- Talaria Sting MX3, MX4, and XXX: Several rotors and spacers list these models, but one 240mm rotor listing says it does not fit the MX5.
- E Ride Pro S and SS models: Many listings include them, but verify your exact version before ordering.
When you are not sure, check the product page or ask us. A quick fitment question beats a returned part.
Which Upgrade Is Right for You?
Casual and Beginner Riders
Start with fresh pads, a proper bleed, and bedding in. This often fixes weak or spongy brakes at a very low cost.
Regular Trail Riders
Add a 220mm rotor, a caliper spacer, and a better pad compound. This combination delivers a noticeable gain without changing the entire system.
Aggressive and Heavier Riders
If you ride steep terrain, carry more weight, or push hard, consider a moto-style kit with a larger rotor and sintered pads.
Upgraded or Faster Bikes
When a bike gets faster or heavier, brakes should keep pace. Plan your brake upgrade at the same time as any performance change, not after.
How to Replace Surron Brake Pads
You can do this at home if you are comfortable with basic tools. Brakes are a safety system, so ask a shop for help if you are unsure.
- Support the bike: Use a stable stand so the wheel is off the ground.
- Remove the pad pin or bolt: Note how the pads and spring sit.
- Push the pistons back: Gently retract them so the thicker new pads fit.
- Install the new pads: Keep the surfaces clean and seat the spring correctly.
- Pump the lever: Restore pressure and confirm the lever feels firm before you ride.
- Bed in the pads: Make slow, controlled stops before riding hard.
How to Install a Larger Rotor and Spacer
- Confirm fitment: Match rotor size, spacer type, and mounting style to your bike.
- Remove the caliper and old rotor: Keep the bolts organized.
- Install the new rotor: Clean the hub surface and follow any direction marking on the rotor.
- Mount the spacer and caliper: Use light thread locker if the spacer maker recommends it.
- Center the caliper: Spin the wheel and make sure it does not rub.
- Test the lever and bed in: Confirm firm lever feel, then bed in the pads.
Brake Fluid and Bleeding
Fluid carries the force from your hand to the caliper, and over time it absorbs moisture and darkens. Bleeding removes air and old fluid, restoring a firm lever.
One important point: brake systems use different fluid types, and mixing them can damage seals. Confirm the correct fluid for your system in the manufacturer’s guidance before you add or replace anything. If you have never bled brakes, a shop can do it quickly and safely.
Troubleshooting Common Brake Problems
- Squealing: Check for contamination, glazed pads, or a loose caliper. Cleaning or new pads often help.
- Spongy lever: This usually means air in the system. Bleed the brakes and inspect the lines.
- Rubbing: Re-center the caliper, check for a bent rotor, and make sure the wheel is seated straight.
- Pulsing: A warped rotor can cause this. Replace it if it cannot be cleaned or straightened.
- Fade: A larger rotor, sintered pads, and fresh fluid can all help.
- Uneven pad wear: Misaligned calipers wear pads unevenly. Check alignment and replace pads as needed.
Safety, Legal, and Warranty Notes
Brakes are your most important safety system. After any brake work, test at low speed in an open area before riding normally, and confirm the lever is firm, the bike stops straight, and nothing rubs. Wear a helmet, goggles, gloves, boots, and protective gear on every ride.
Most electric dirt bikes are built for off-road use, and rules differ by state and city. Check local regulations and stick to private land or areas where riding is permitted. Also review your manufacturer’s warranty terms before you modify brakes, since some changes may affect coverage. If you are unsure, ask us before you start.
Brake Upgrade Buying Checklist
- Does the listing name my exact bike and model year?
- Is the rotor size compatible with my caliper or bracket?
- Do I need a spacer or adapter, and is it included?
- Do the pads match my caliper shape?
- Do I know which fluid type my system uses?
- Do I have the tools, or a shop, ready for the install?
- Have I checked how the change affects my warranty?
Shop Brake Upgrades at Amped Sportsman
Ready to upgrade? Browse our parts and accessories for brake-related items, or explore the full Sur-Ron collection to see what we carry for your bike.
Not sure which pads, rotors, or spacers fit your bike? Call us at 347-284-8987 or email info@ampedsportsman.com with your bike, model year, and riding style. Our team will help you confirm fitment and choose the right upgrade before you order. If you find a lower price elsewhere, you can also request a price match.
Common Mistakes to Avoid
- Skipping fitment checks. Brake parts differ by bike, and the Ultra Bee is not the same as a Light Bee.
- Forgetting the spacer. A larger rotor needs the caliper moved to match.
- Mixing rotor sizes and brackets. A 220mm rotor will not work correctly in a 240mm bracket.
- Skipping bed-in. New pads need slow, controlled stops before hard riding.
- Mixing brake fluids. Use only the type your system calls for.
- Contaminating pads. Keep lube and oil off pads and rotors.
- Upgrading speed before stopping power. A faster bike needs stronger brakes first.
Frequently Asked Questions
When should I upgrade my Surron brakes?
Upgrade when you notice fade, a long or spongy lever, persistent noise, or longer stopping distances, or when your riding or bike setup becomes more demanding than the stock brakes can handle.
What size are the stock Surron Light Bee brake rotors?
The stock rotor on most Light Bee platform bikes is 203mm. Thickness is listed at around 1.8 to 2.0mm depending on the source.
Do I need a spacer for a 220mm rotor?
Usually yes. A caliper spacer or adapter bracket moves the caliper outward so the pads line up with the larger rotor. Check the listing for what your bike needs.
Should I choose organic or sintered brake pads?
Organic pads are quieter and smoother, which suits casual riding. Sintered pads resist heat and last longer, which suits aggressive riding and long descents. Match the pad to your caliper.
What is the best first brake upgrade for a Surron?
For most riders, fresh pads, a proper bleed, and a 220mm rotor with a spacer give the best improvement for the money. A moto-style kit is the next step for hard riders.
Do Light Bee rotors fit the Surron Ultra Bee?
Not necessarily. Several 220mm rotor listings say they do not fit the Ultra Bee, so always confirm fitment for your exact model before you order.
How do I bed in new brake pads?
Make a series of slow, controlled stops in an open area, gradually increasing pressure without locking the wheel. Avoid hard braking until the pads are bedded in.
Final Thoughts: Know When to Upgrade, Then Choose Wisely
Good brakes make every ride safer and more fun. Watch for the warning signs, start with fresh pads and a clean bleed, move to a larger rotor when you need more power, and consider a full kit if you ride hard. Check fitment, take your time with the install, and test carefully before you ride.
When you are ready, explore our parts and accessories or reach out to our team. We are here to help your bike stop as well as it goes.